This guide walks you through ordering a cloud VPS on AtoZNode, from creating an account to seeing your server's IP address. It takes about five minutes. The screenshots use a demo account, so the names and numbers are made up.
Before you start
You need an email address and a way to pay in rupees. AtoZNode accepts UPI, cards and net banking through Razorpay, or you can pay from a prepaid wallet. You do not need a domain name to get a server.
1. Create your account
Open the sign-up page, enter your name, email and a password of at least 10 characters, and accept the Terms. We email you a link to confirm your address. Your account is created when you open that link, so check your spam folder if it does not arrive within a few minutes.
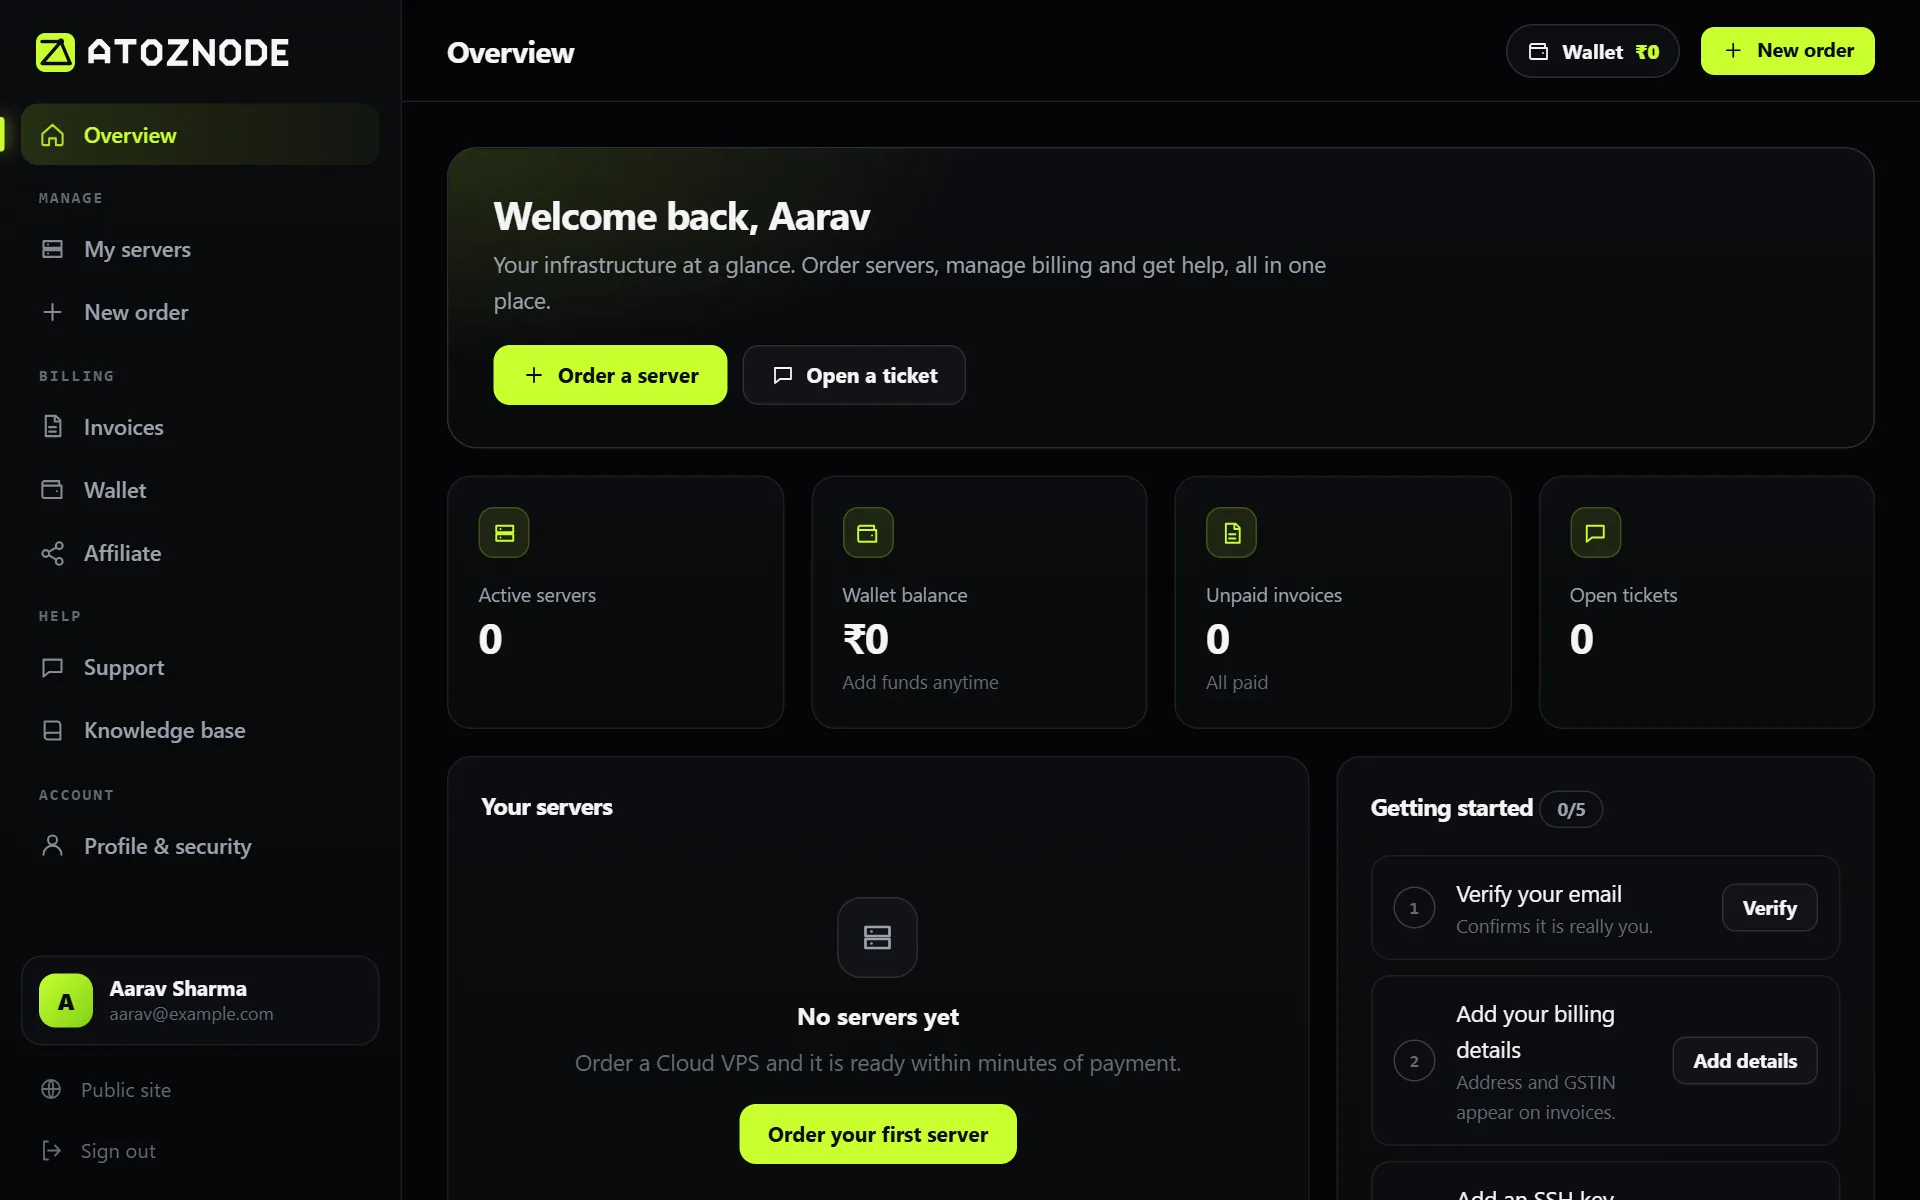
After you confirm, you land in your client area. It shows your servers, invoices and wallet balance.
2. Choose a plan
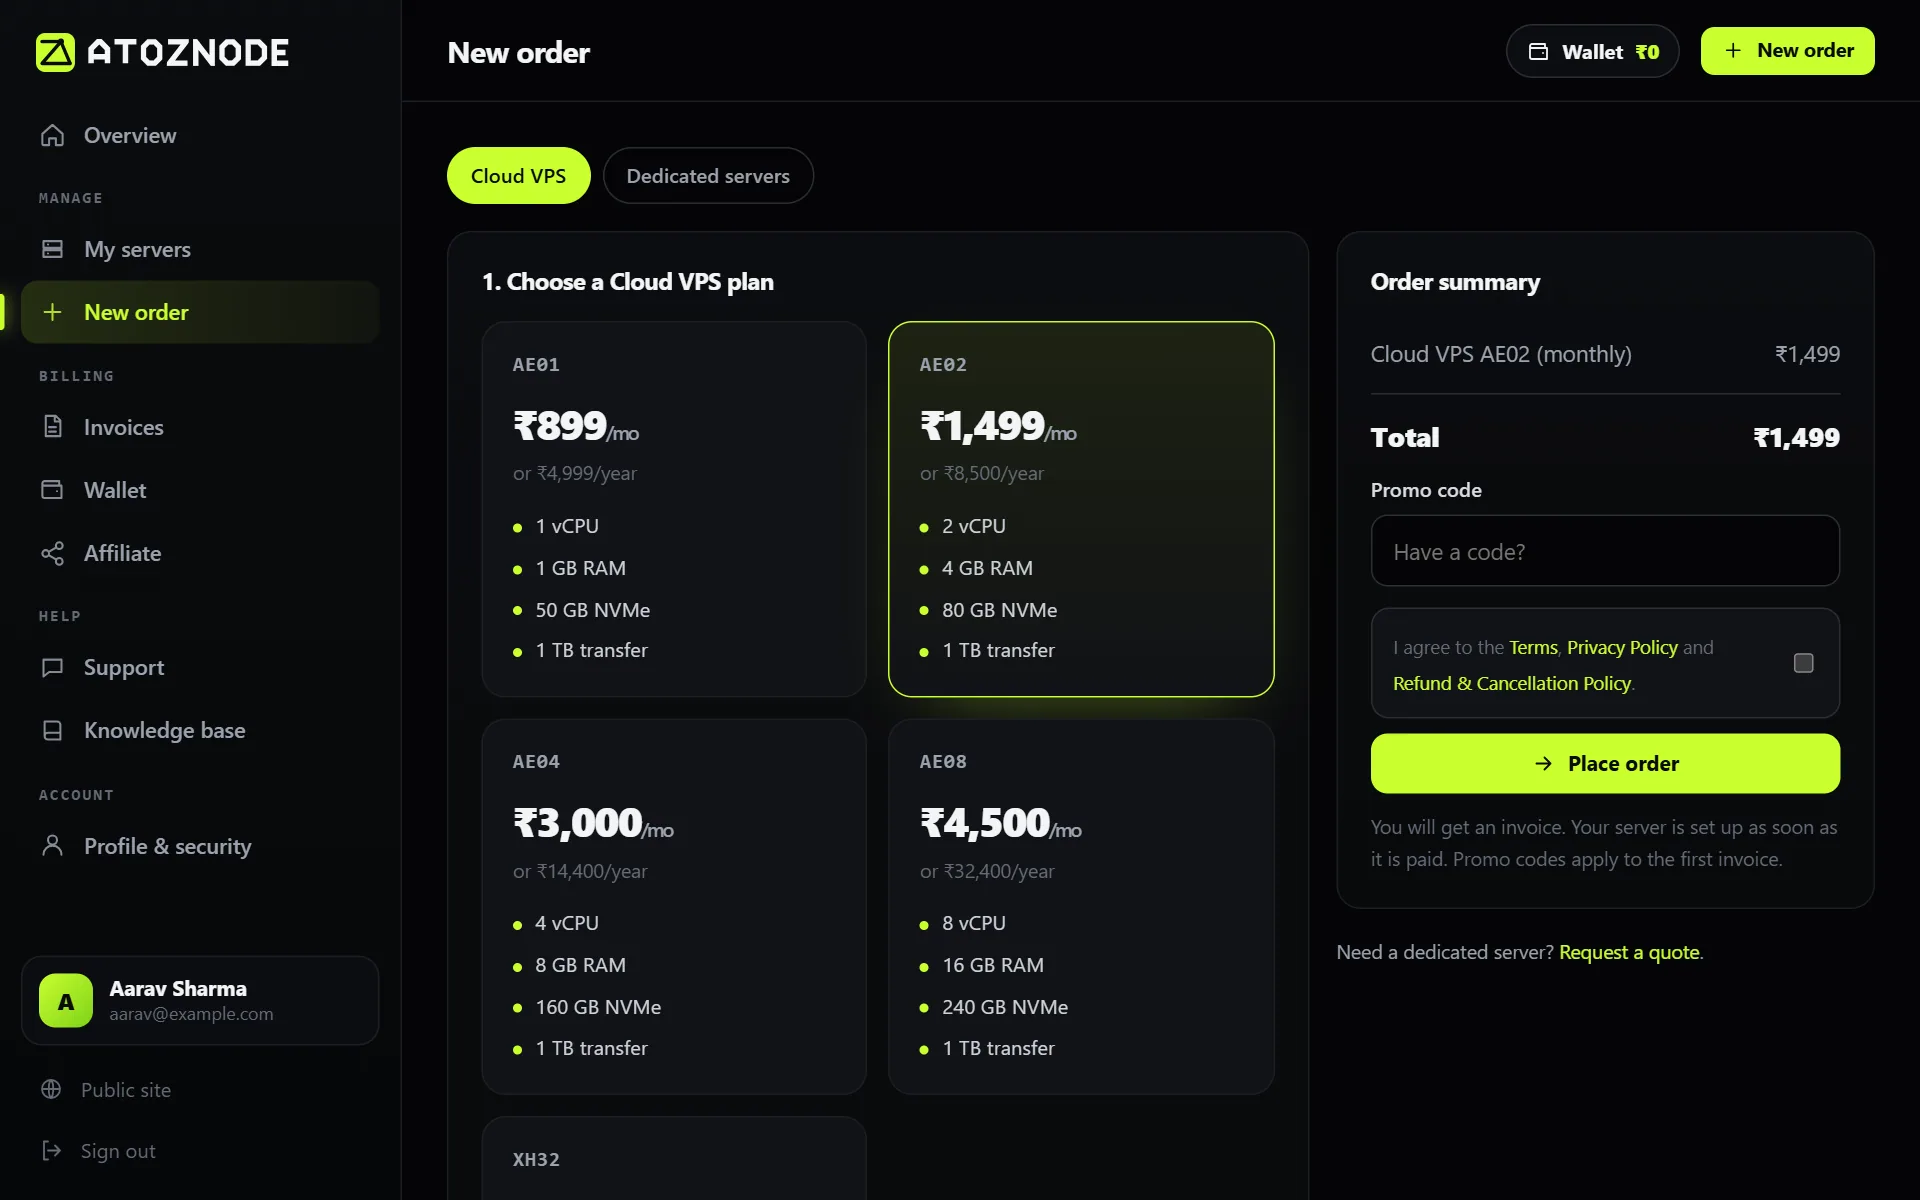
Open New order in the left menu. Each plan lists its vCPU, RAM, NVMe storage and monthly transfer, so you can compare them side by side. If you are not sure which size you need, read how much RAM and CPU a VPS needs. A small site or a bot runs well on the smallest plan, and you can move to a bigger one later.
3. Set the billing cycle, hostname and operating system
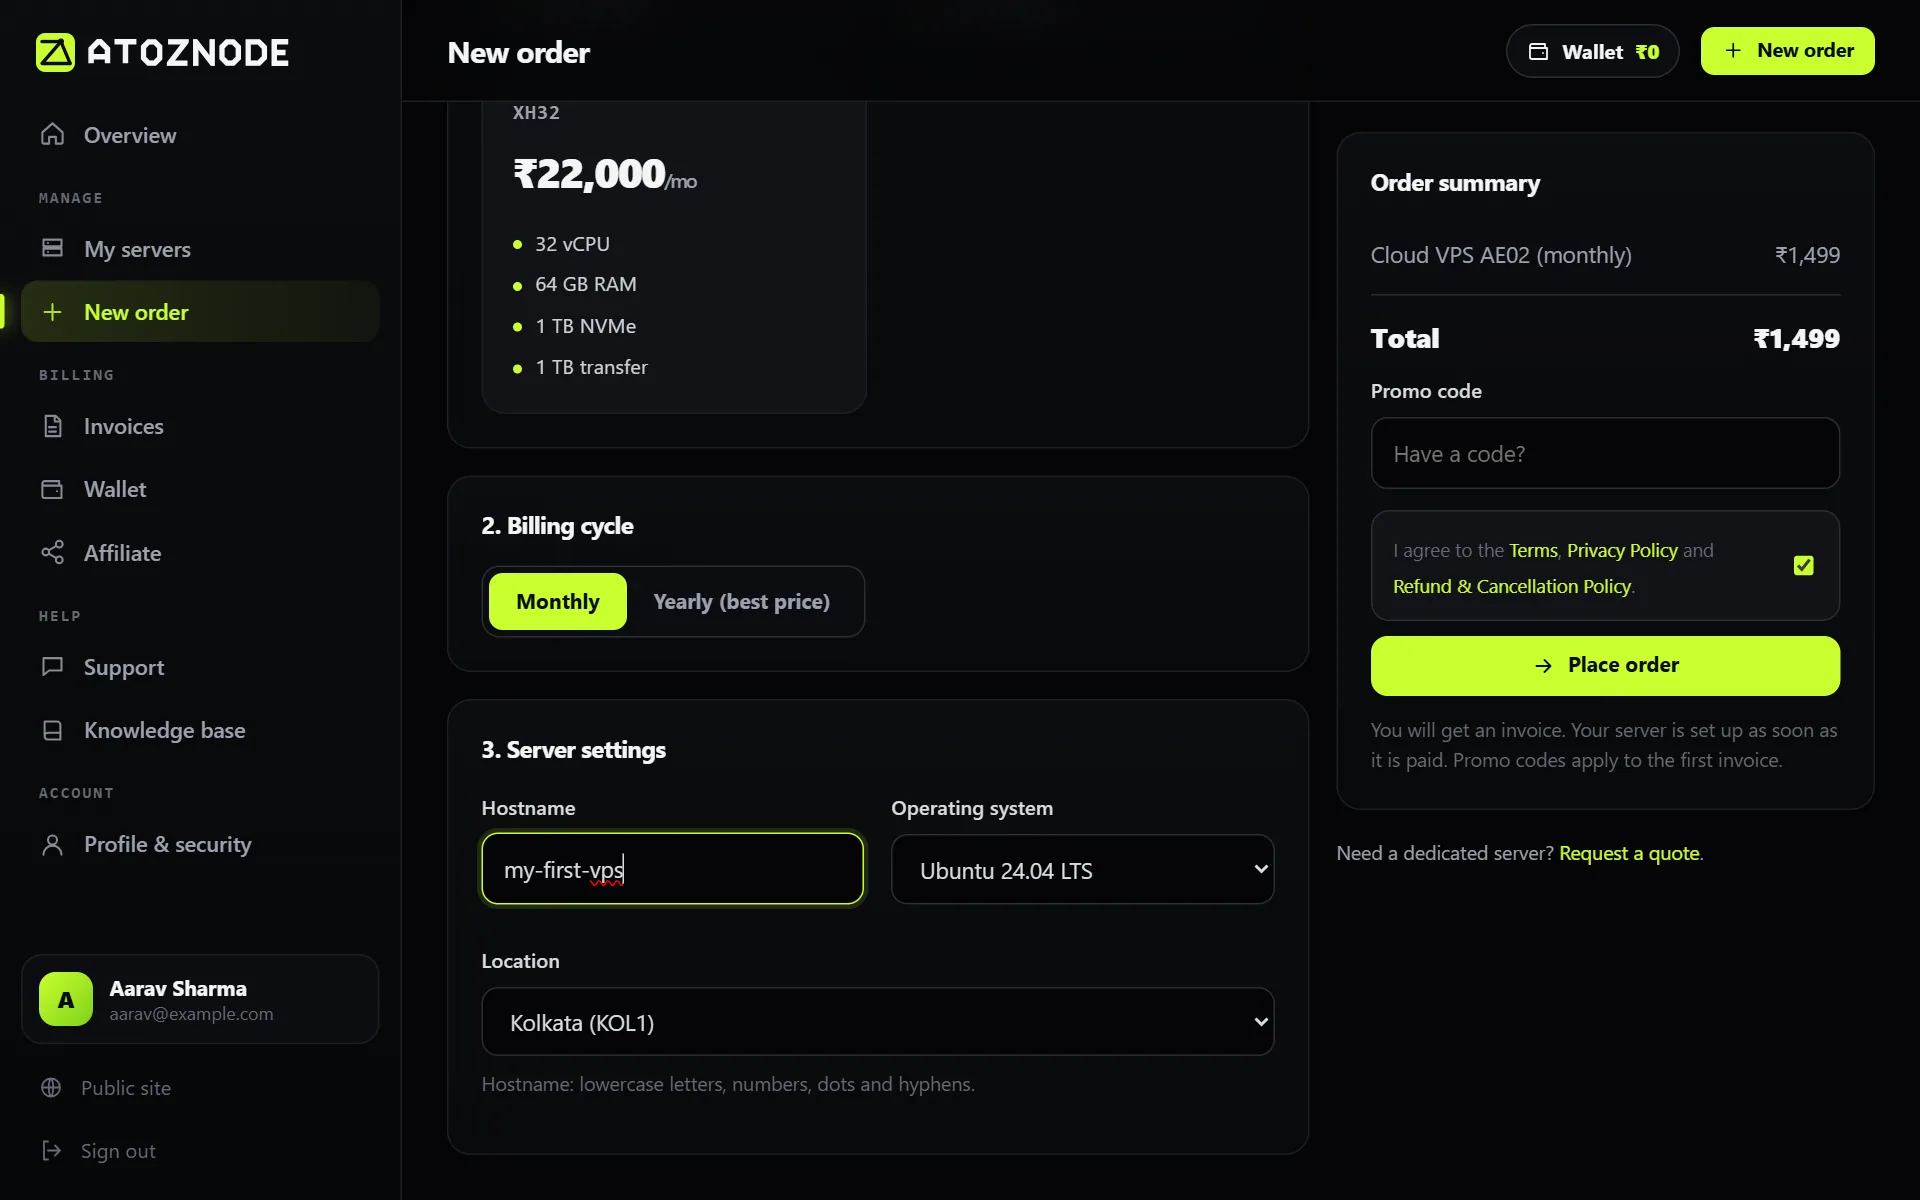
- Billing cycle: choose monthly, or yearly for a lower price where the plan offers it.
- Hostname: a name for your server, such as
my-first-vps. Use lowercase letters, numbers, dots and hyphens. - Operating system: pick a Linux image. Ubuntu 24.04 LTS is a good default because most guides are written for it.
- Location: pick the data center if more than one is listed.
- Promo code: enter it here if you have one. The price on the right updates straight away.
Tick the box to accept the Terms, Privacy Policy and Refund and Cancellation Policy, then press Place order.
4. Pay for the invoice
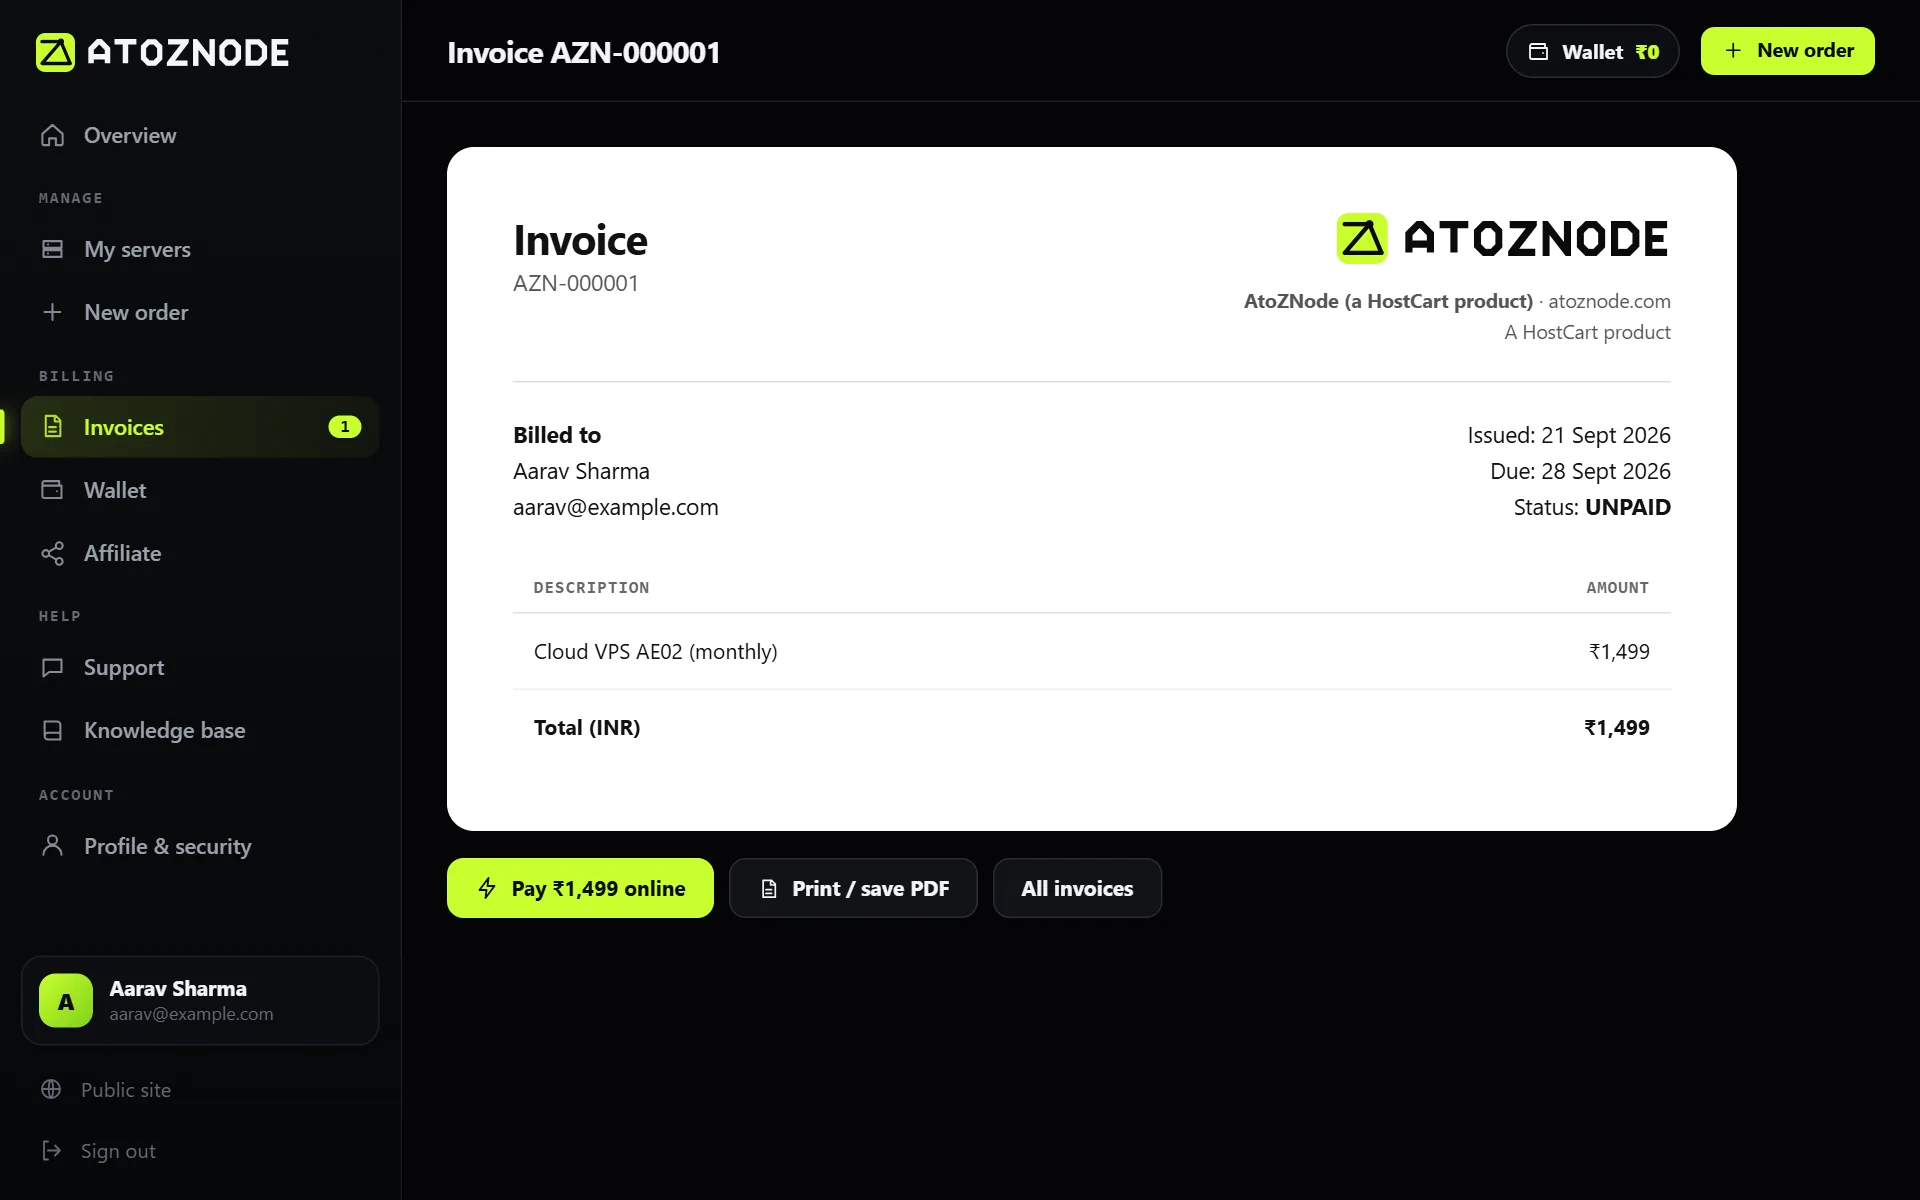
Placing the order creates an invoice and takes you to the payment page. A secure Razorpay window opens where you can pay by UPI, card or net banking. If your wallet already holds enough money, you can pay from it instead. See how to pay for your server for every option.
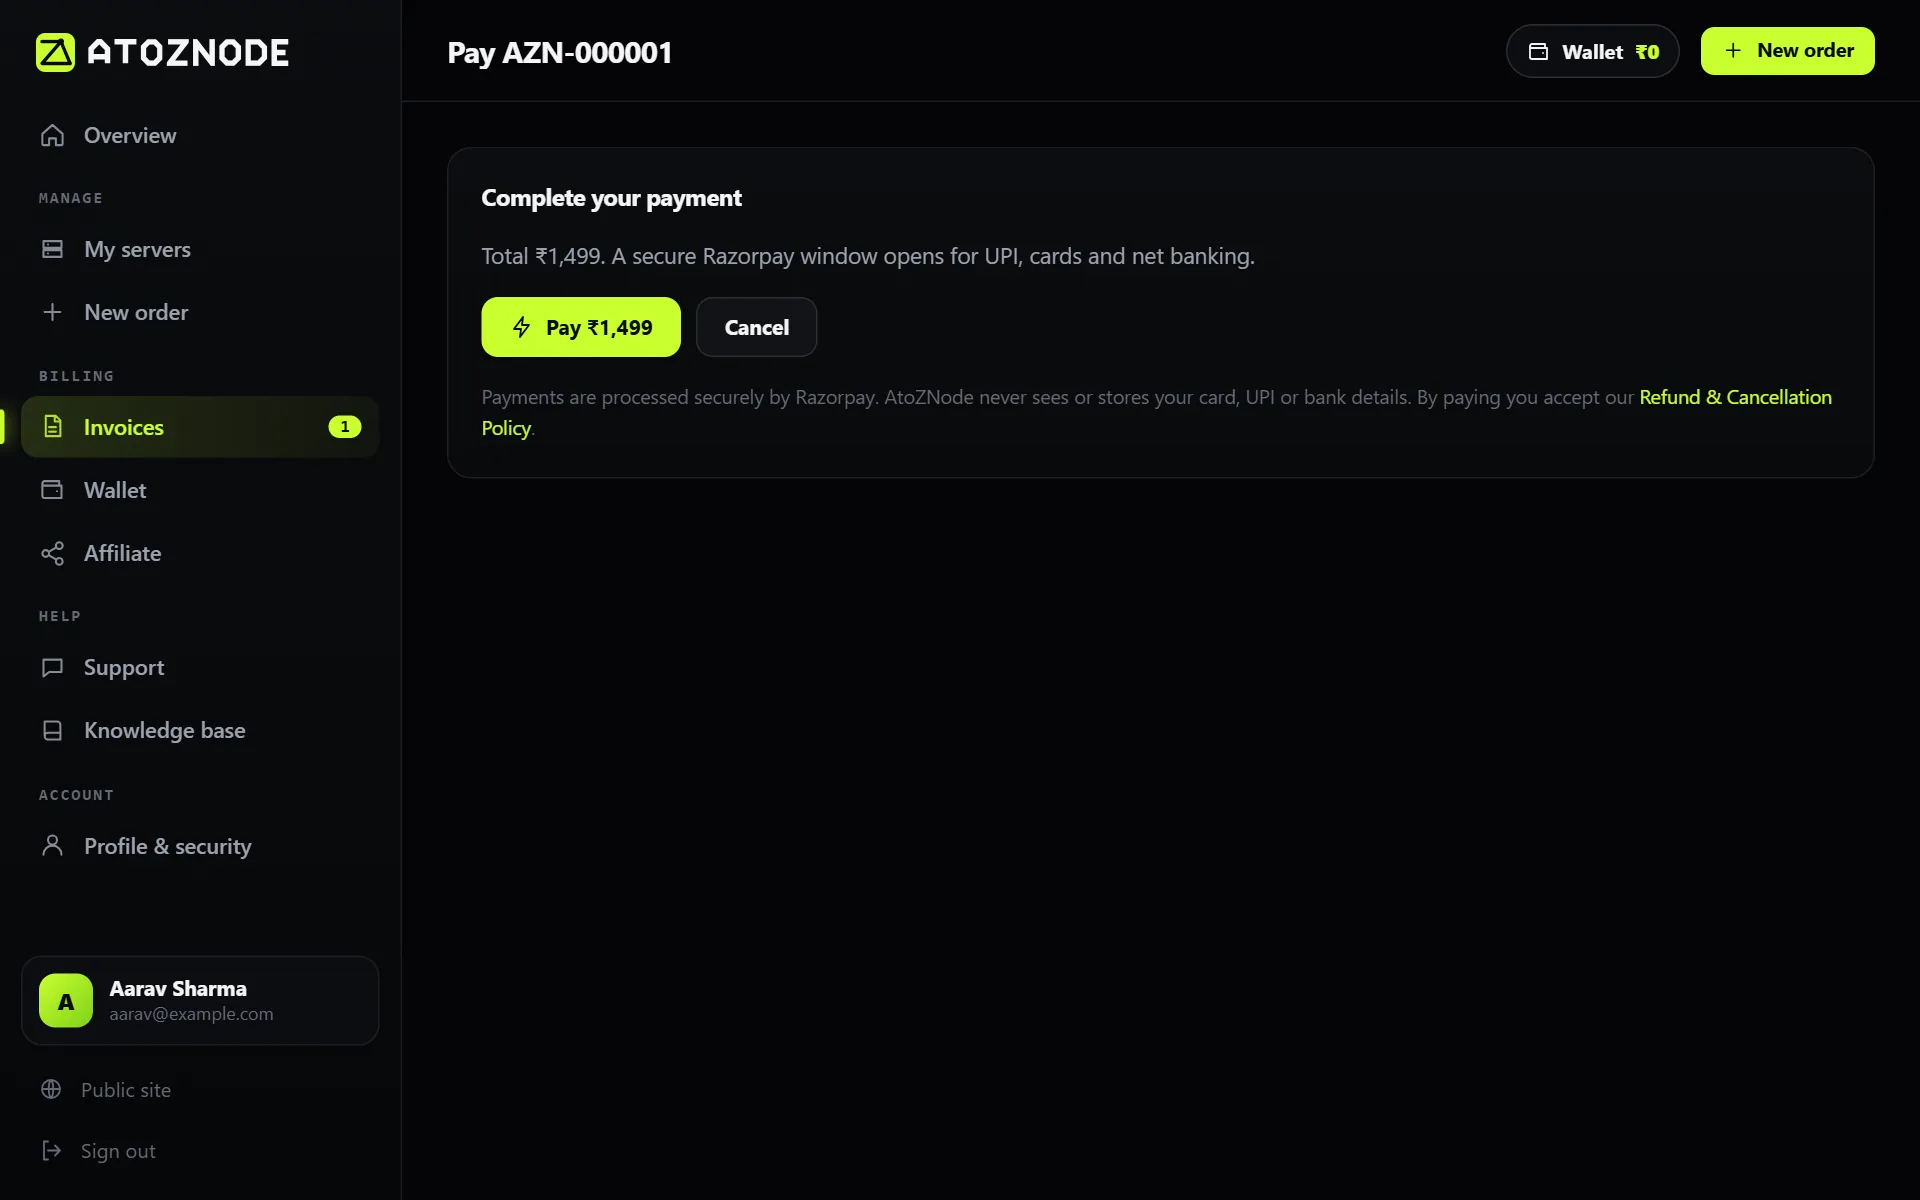
Your invoice stays open for seven days. You can find it again under Invoices at any time.
5. Find your server's IP address and login
Once payment is confirmed, your VPS is created automatically. This usually takes a few minutes, and we email you when it is ready. Open My servers and click your server. The Network & access tab shows the IP address and the ready-made SSH command.
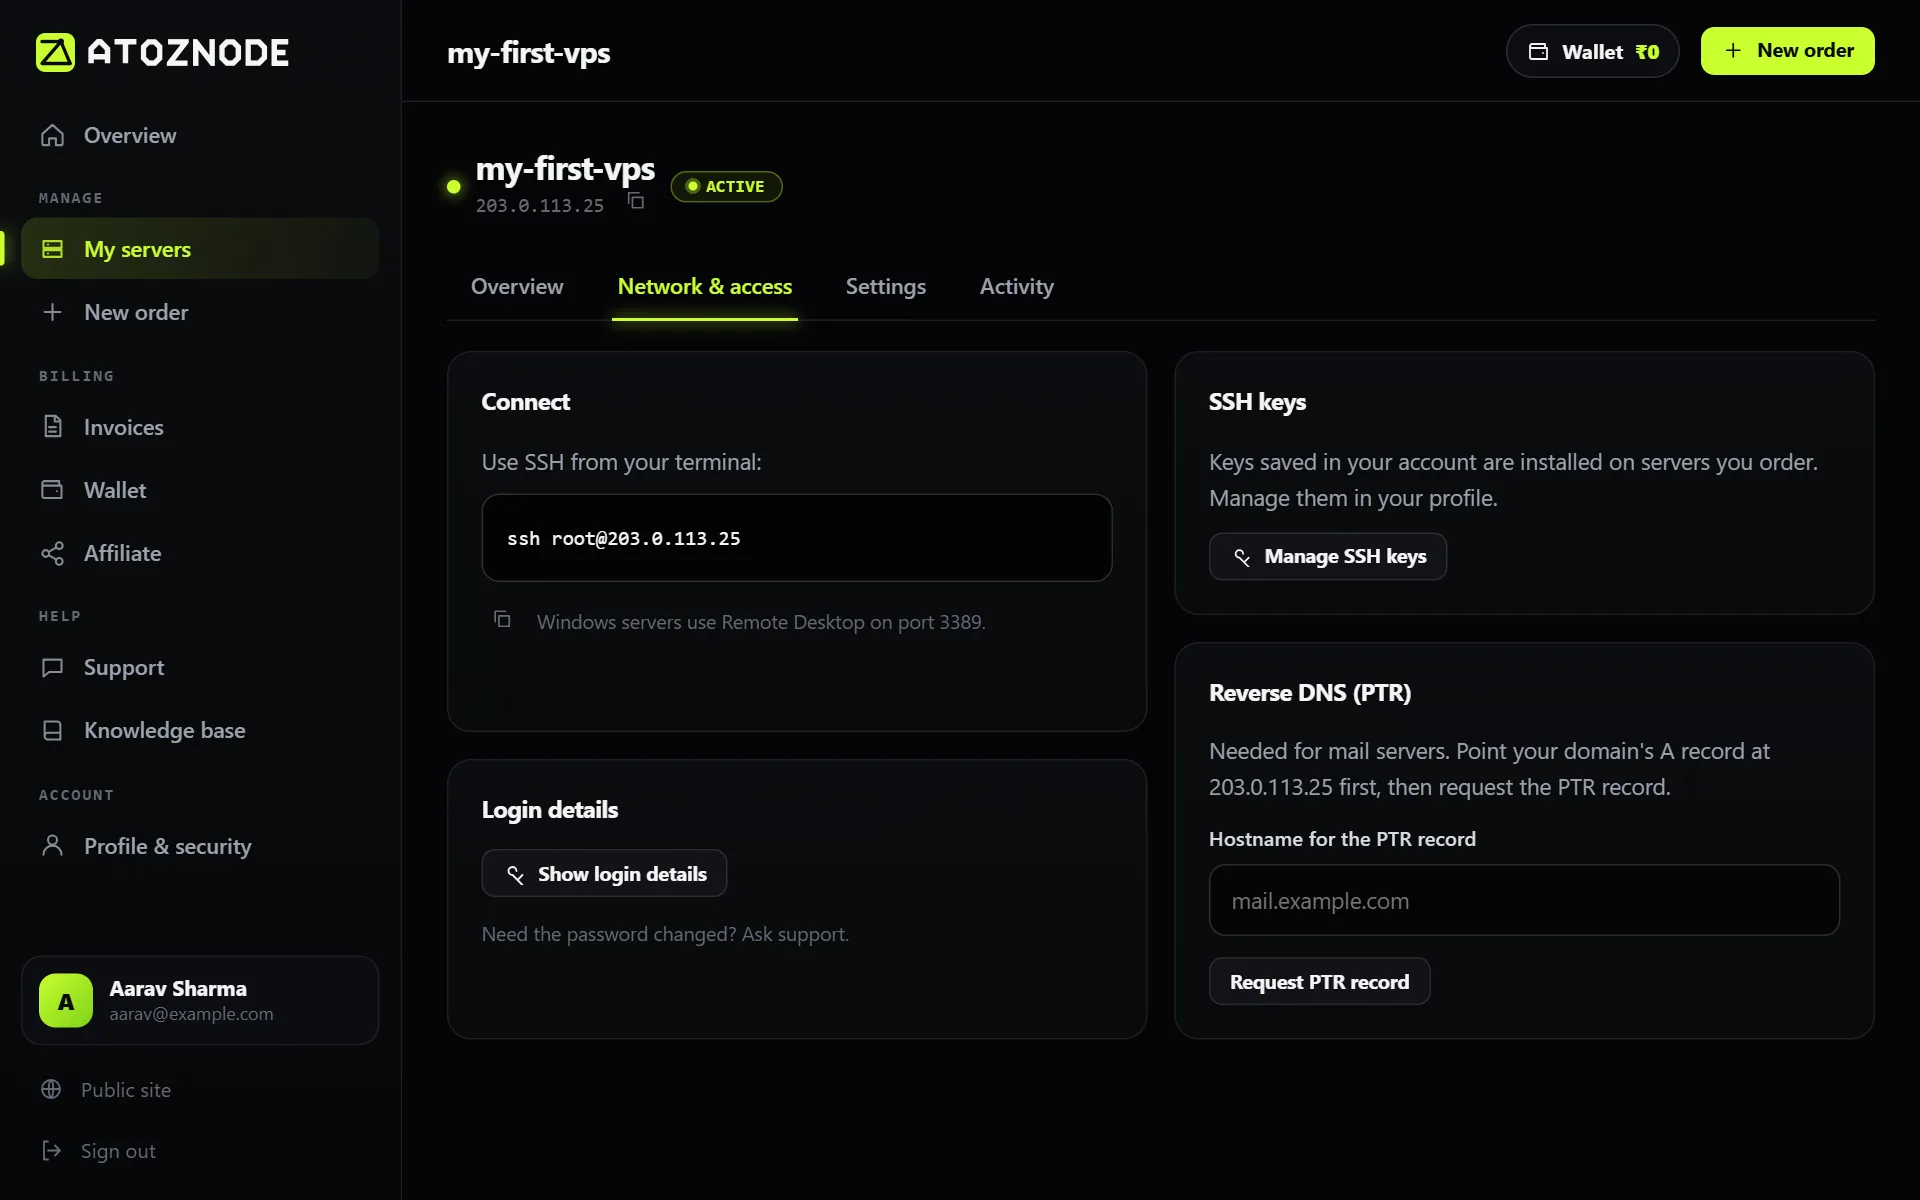
Press Show login details to reveal the root password. Passwords are hidden until you ask, so nobody sees them over your shoulder.
What to do next
- Connect to your VPS with SSH from Windows, Mac or Linux.
- Secure the server with a firewall, key login and fail2ban before you put anything on it.
- Turn on two-step verification for your account.
If a server is not ready when you expect it, open a ticket from the Support page and we will look into it. Our service delivery policy explains what to expect.